


Here, we explain how to fax a receipt quickly and easily. With the WiseFax online fax service, you can send a receipt from your phone or computer in just a few seconds, without a fax machine.
- Upload your receipt to WiseFax and select the pages you want to fax
- Select the recipient’s country and enter the fax number
- Sign in and make a one-time purchase of fax tokens, if required
- Click the “Send” button to confirm your fax
How to fax a receipt?
Many employers, insurance companies, and stores still accept receipts by fax. You may need to fax a receipt to submit an expense report, request a reimbursement or refund, file a warranty or insurance claim, or provide proof of purchase. WiseFax lets you fax a receipt quickly, easily, and securely. Start by uploading your receipt to WiseFax.
If you have a paper receipt or a card payment slip, take a photo of it with your phone. You can fax JPEG, PNG, HEIC, and other images, as well as PDF receipts and invoices you received by email. Before faxing, you can crop the photo and improve its contrast so that small print stays readable, which is especially helpful for faded thermal paper receipts.
To upload your receipt, use the Click here to select the document button. A new window will open where you can select the file you want to fax.
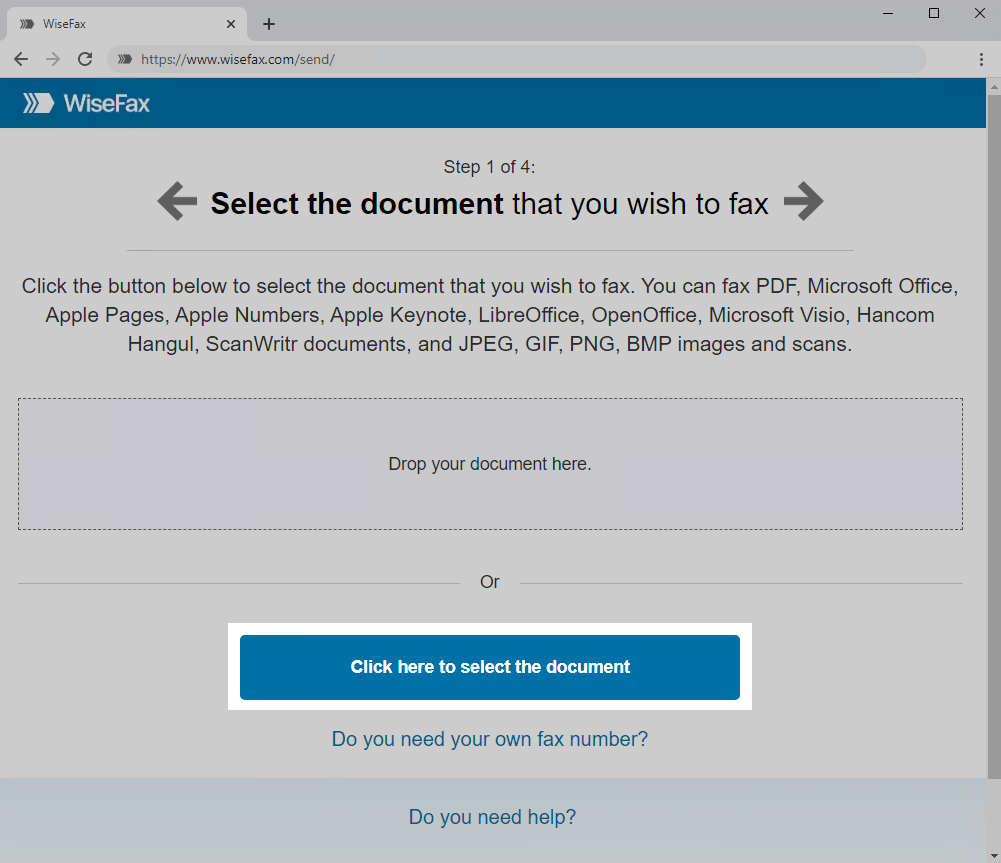
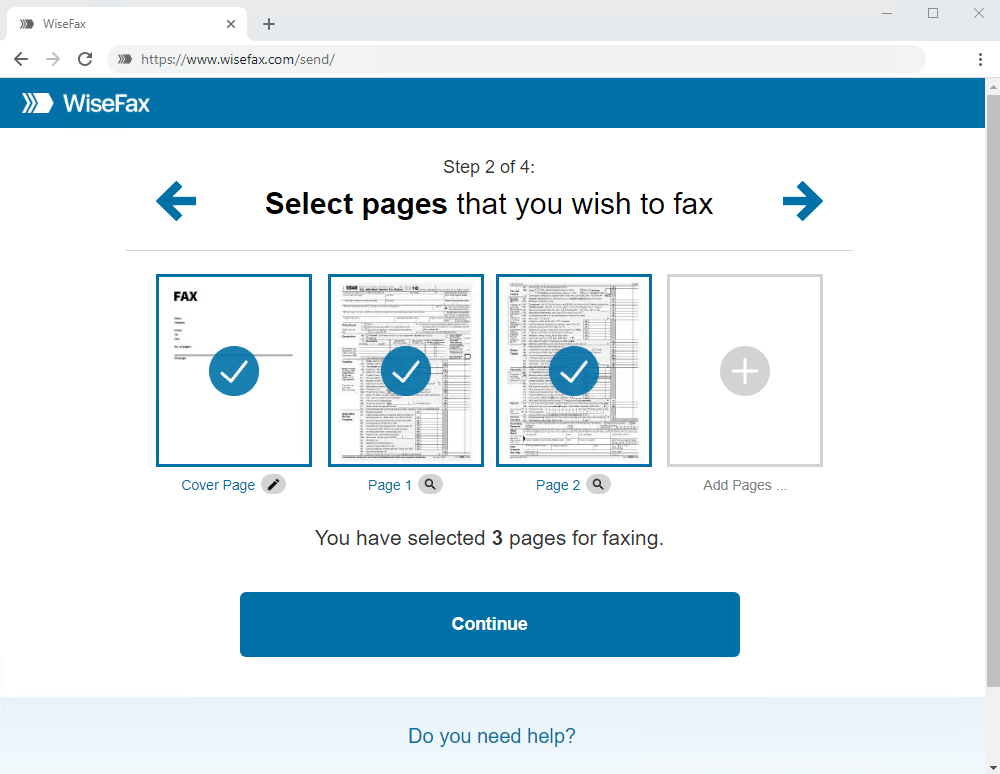
Next, select the pages you want to fax. To add more receipts from other files, click Add Pages and select those files. You can also add a cover sheet, for example with your claim or expense report number. Once you have selected all the pages, click Continue.
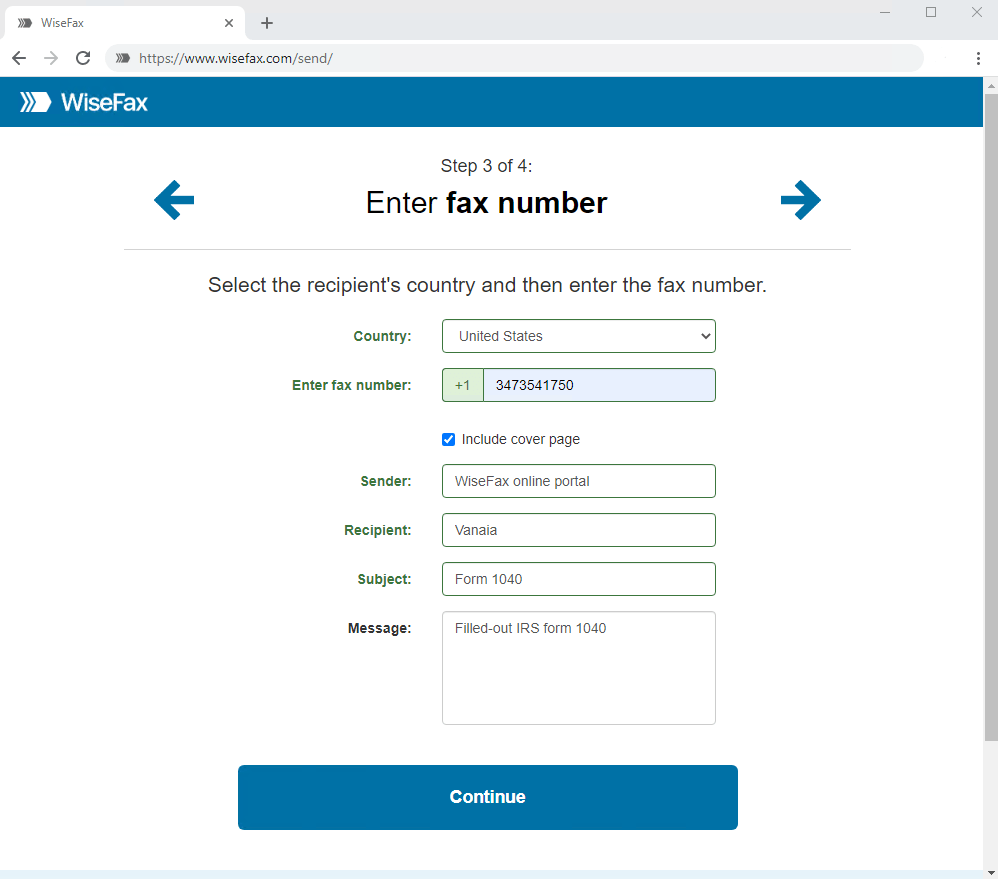
Enter the recipient’s fax number and click Continue.
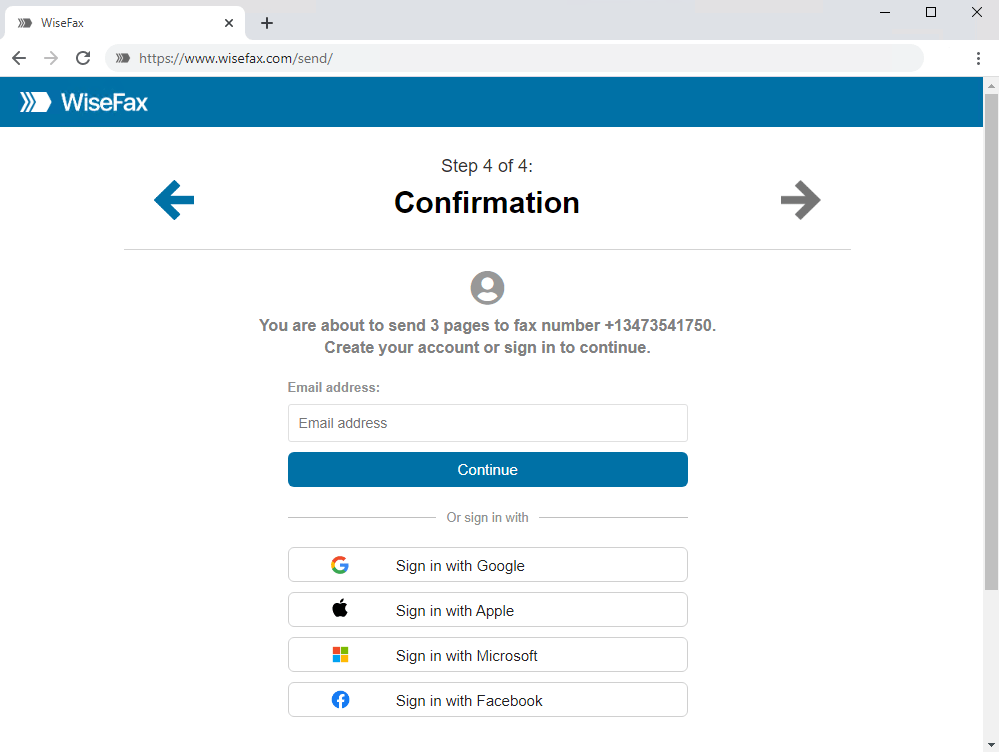
Signing in and confirming fax
Select the account you want to use to fax your receipt. You can sign in with your email address or with your Google, Apple, Microsoft, or Facebook account.
If you don’t have enough fax tokens, choose one of the purchase options and make a one-time payment. The last step is to click the Send button. You will receive an email notification as soon as WiseFax starts processing your fax. This usually happens within a few minutes.
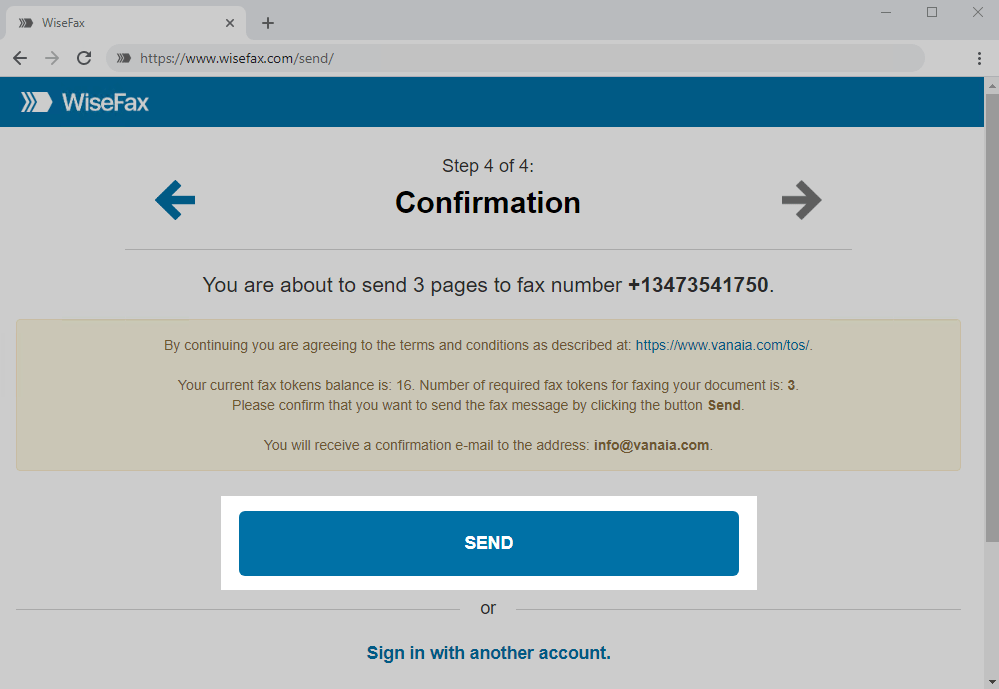
You will receive an email confirmation as soon as your fax is delivered to the recipient, so you have proof that your receipt was sent. If WiseFax can’t deliver your fax, you will also receive an email notification, and you can send it again later without buying additional fax tokens.
Now that you know how to fax a receipt, click Send a fax now and send your receipt in minutes.